I've done all the research when it comes to DIY Ssharpie plates and mugs and discovered some solid dos and don'ts of crafting these giftable works of art.
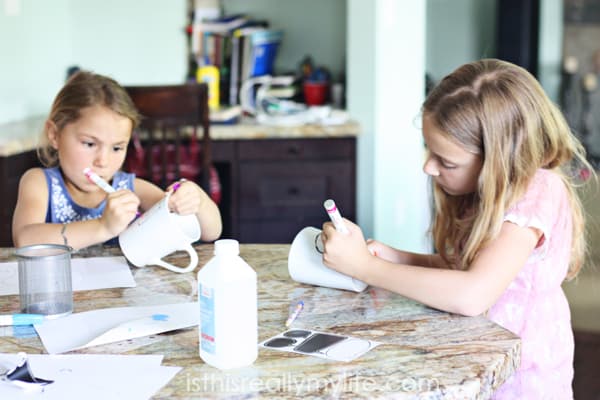
I recently planned a super fun playdate for George and Livi and a couple friends. The playdate involved some outdoor fun (bubbles on the trampoline are the BEST!) and some refreshment (granola bars and juices boxes FTW!), but I also wanted to throw in a super simple Father's Day craft since I so rarely plan playdates.
Or craft.
I did a bit of research on DIY Sharpie plates and DIY Sharpie mugs and found all kinds of how-tos. I sorted through the info and came up with what I thought was a solid plan.
I'd say it ended up about 92% solid.
I learned a thing or two about using Sharpie on plates and thought I'd share those bits of wisdom with you. I still think it's a bit of a crap shoot but I tend to feel that way about most crafts. Hashtag story of my life.
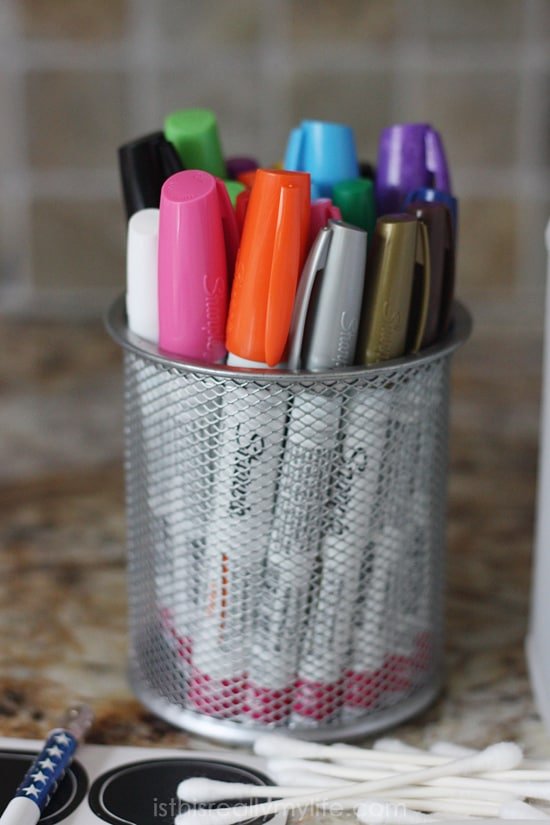
DO assemble all necessary Sharpie plate materials (dry erase marker not pictured) including more cotton swabs than you think you'll need.

DO use rubbing alcohol to remove any mistakes until your 17-year-old tells—and then shows—you that dry erase marker is easier.
DO use dry erase marker moving forward. (Color over the Sharpie plate mistake and simply wipe clean; less messy than the rubbing alcohol.)
DO use Sharpie oil-based paint markers.
DON'T let the kids try to get the markers started. You'll end up with Sharpie oil paint all over your kitchen counter and all over their hands.
DO have kids wear paint shirts or smocks when crafting their DIY Sharpie plates just in case (see above).
DO use dollar store mugs and plates if you're feelin' lucky.
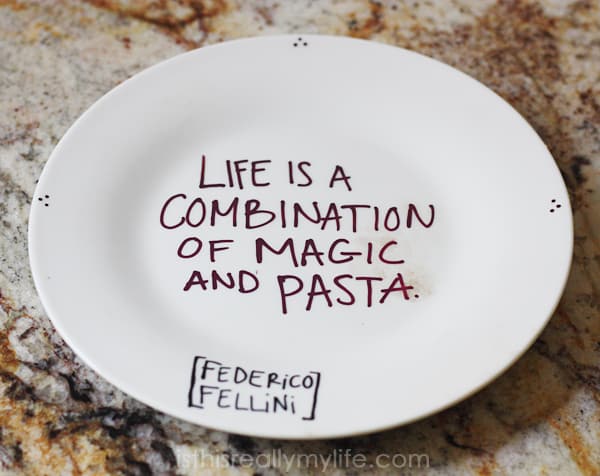
DON'T use dollar store mugs and plates if you're not. You may end up with random discolorations. You can see it in Madison's "pasta" plate above. Next time I think we'll try IKEA.
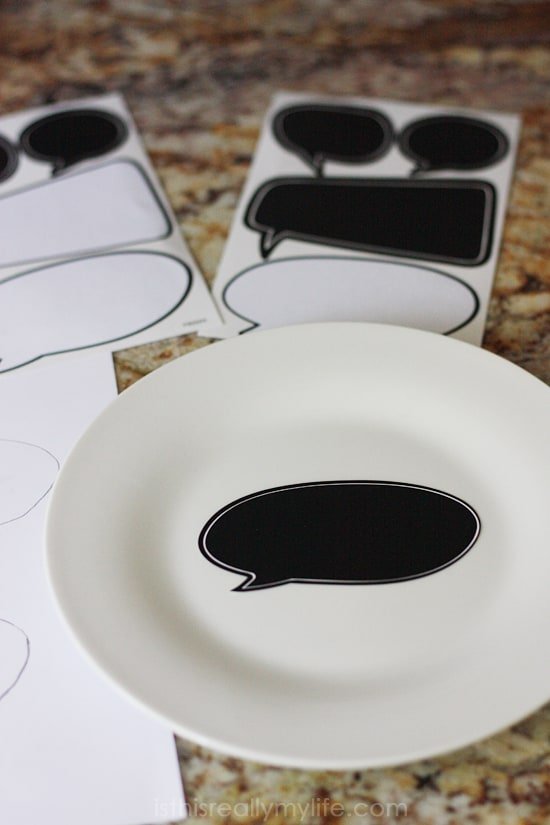
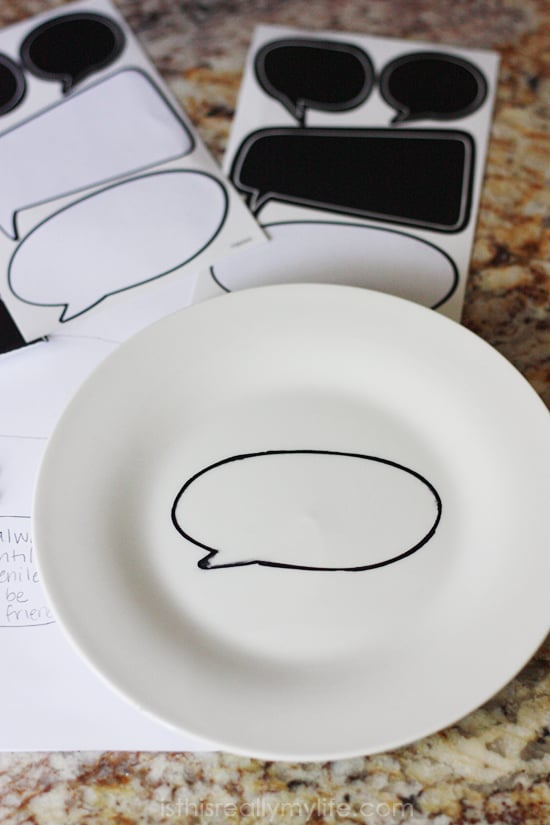
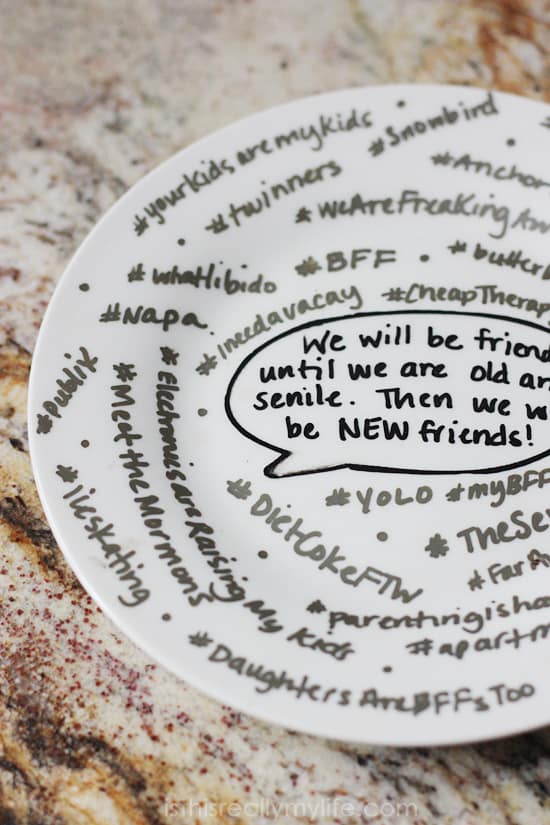
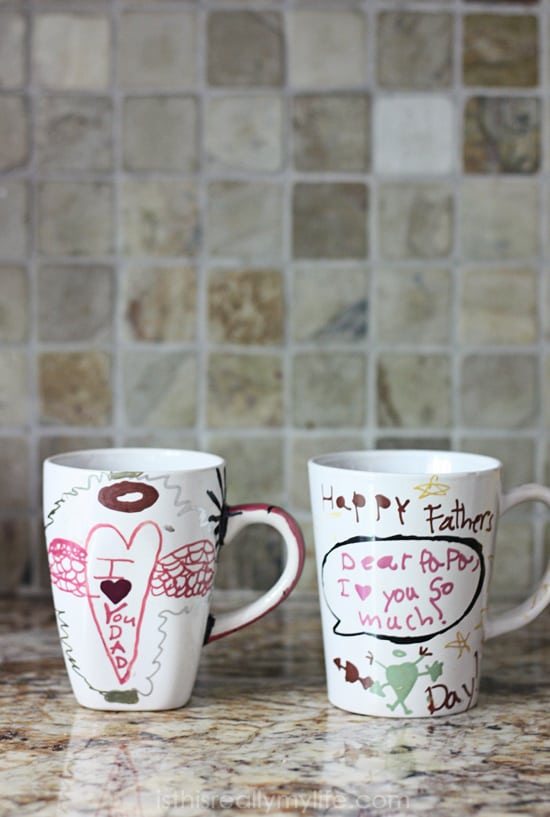
DO use stickers or stencils to create fun designs on your DIY plates and mugs. I gently stuck a speech bubble to a plate and then used the black paint marker to outline it. I let the marker dry before carefully removing the sticker. You can also use letter stickers like in this kid-made scribble mug.
DO practice your DIY plate design on scratch paper so you don't get high from all the dry erase marker you use to correct your mistakes.
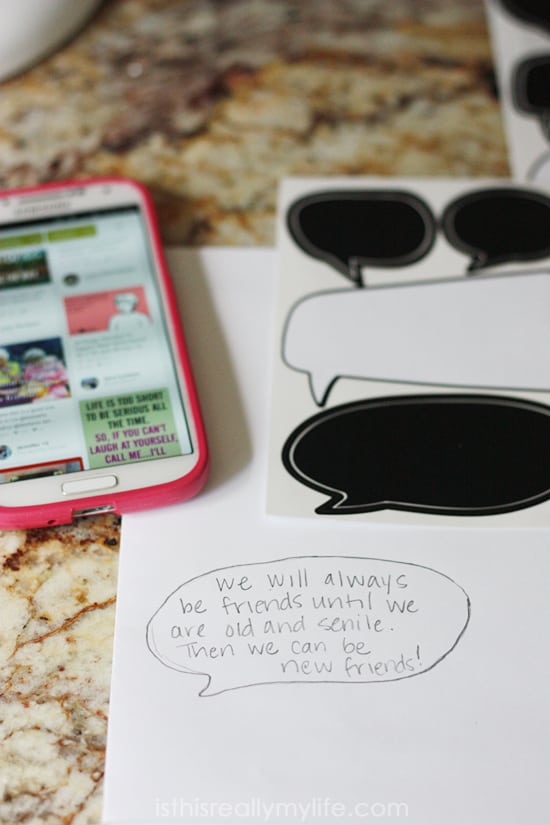
DON'T use your own handwriting if your 17-year-old's handwriting is cuter.
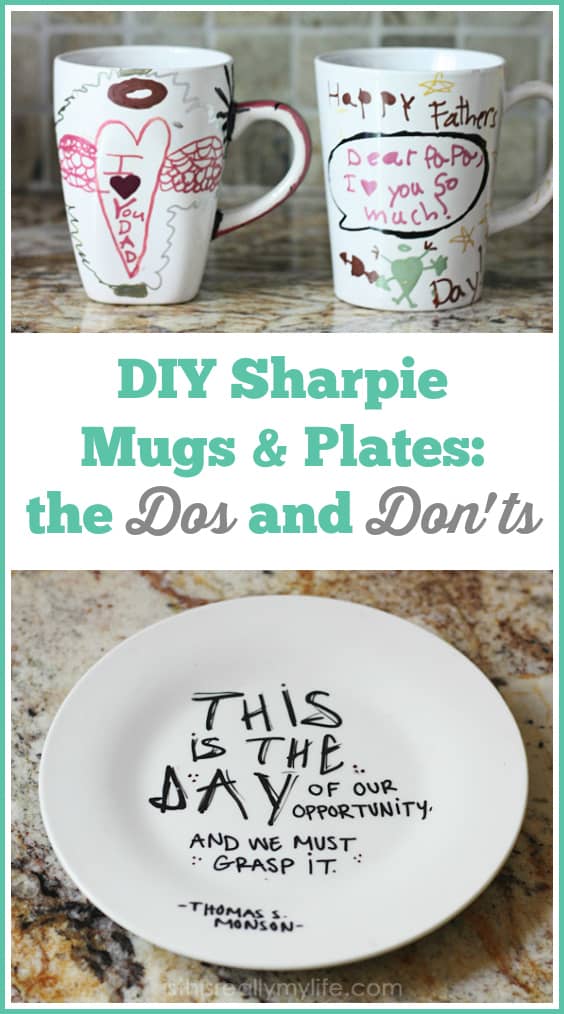
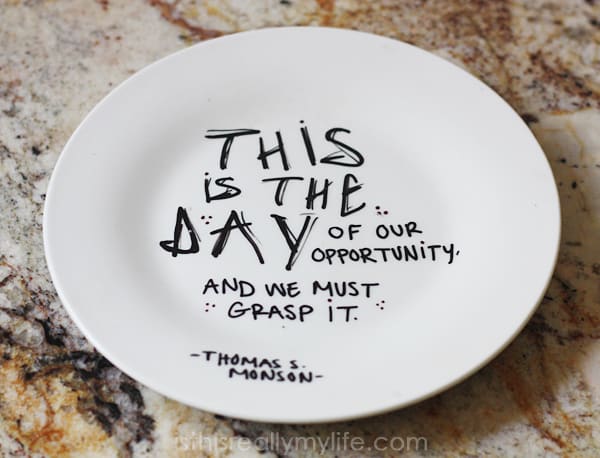
DON'T assume the colors of the markers will remain close to the original after baking. You'll be seriously disappointed. For example, the red turned to dark purple and the gold to silver.
My plate before baking:

My plate after (still pretty but no longer gold):
Before baking, Madison's DIY plates were black with red accents. After baking, they were black with dark purple accents.
DO wait 72 hours before baking your Sharpie plates and Sharpie mugs.
DON'T let your kids continue to add to his design over the course of a week or it may not be done in time for Father's Day.
DO place mugs and plates in a cold oven and set bake temperature to 425. Let bake 1 hour and allow to cool completely before removing. This should help prevent cracking.
DO hand wash mugs and plates...unless you're still feeling lucky, then by all means take your chances with the dishwasher. Or the dog.
DON'T let the dog clean the mugs or plates. That's just gross.
DO have a lot of fun!
Pat
Can you eat put food on the plates
Emily Hill
Yes you can! We do it all the time.
Dragon cat
Just a quick note- it's not the fault of the dollar store ceramics that your markers discolored, as far as I know! This pin right here is a lovely little guide to sharpie mugs: https://www.pinterest.com/pin/455145106071353095/
So, your 425° oven was probably too hot for the sharpies to stay the right colors. :c
Better luck next time, right?
Kellie Hilliard
I used some nice mugs I got at walmart for 1.50 I think it was. they turned out very nice. true the colors do change and it tells you on the package of paints I had that they would darken. I had a blue and wish I had known it would end up greenish after baking I could have done so much more! haha
Ami
My daughter used rubbing alcohol for a cute sharpie marker design on a porcelain plate... can I still bake that? Or will it catch on fire?
Emily Hill
We used it to clear up any mistakes before baking and didn't have any issues. I'm pretty sure the alcohol evaporates so you should be good, but keep an eye on it just in case!
Jackie
The alcohol will evaporates real fast after using it.
Heather
These turned out really cute! Glad you found out the dry erase marker trick, that definitely makes corrections easier. Thanks for sharing!
Emily Hill
Thanks! And you're welcome!
Meagan
Why do you suggest to wait 72 hours before baking? This is super helpful, I've been wanting to do some plates but just haven't gotten around to it!
Thanks!
Emily Hill
It seemed to ensure the Sharpie was thoroughly dry and set before baking, which helps it to last longer even through dish washing. But you can totally try it without waiting that long!
Rebecca
How long does the design or wording on the plate or mug usually last?
Emily Hill
Ours have lasted a really long time--like a couple years. Granted, those mugs aren't used as often as our everyday glasses.
Gillian Davies
Hi I was wondering where to get the eraser marker from I stay in Scotland.
Emily Hill
I bought the Sharpie markers and the dry erase markers on Amazon. You can often find them at hobby/craft stores too!
Denise
Any luck with Sharpie permanent markers?
Emily Hill
I haven't tried it but I know lots of people use them and they seem to work fine!
Martha
Is the hour baking time after the oven has finished preheating or an hour as soon as you put it in the oven?
Emily Hill
It's an hour after you put it into the oven. Hope that helps!
Ashley
Super cute and informative :) Thank you!!
Meagan
Can you do this on melamine plates or does it have to be ceramic?
Emily Hill
I've never tried it! I bet you could google and find a DIY for melamine plates or mugs!
Kellie Hilliard
pretty sure melamine are not oven safe. You have to be careful with those as they are not for the microwave either. they emit toxic chemicals if you use them in the mirco.
Amyla
I did this but i put in the oven after 48 hours, and when i took it out the words were faded like it was scratched off. Any idea why that happened? What can i do differently?
Emily Hill
That's so weird! I really don't know. Mine faded slightly but not that much. Did you use Sharpie oil-based paint markers or regular Sharpie pens?
Kellie Hilliard
did you clean the whole thing with rubbing alcohol prior to painting. Not saying this is the case, but maybe residue on the item before you drew on it? the alcohol should clear all that off.
Angie
I love your entertaining writing style. Cant wait to try this. Thanks for telling us about the trial & errors so we can hit the ground running. :)
Julia Harbor
I'm doing this with my class at school. Do you think i can stack the plates in the oven? Baking one at a time will take too long.
Thinking leave plates for 72 hours, seperatign plates with baking paper and stacking maybe 10 at a time.
Marina Nicklin
Hi I'm going to do this too. I have 27 plates to bake. How did you go with stacking them?
Sari
Do I must use sharpie or will other brand work
Claudia
Does the 400degrees make the use of sharpies on the plates food safe?